polprog, 15 feb 21. Click on an image to see a full size version
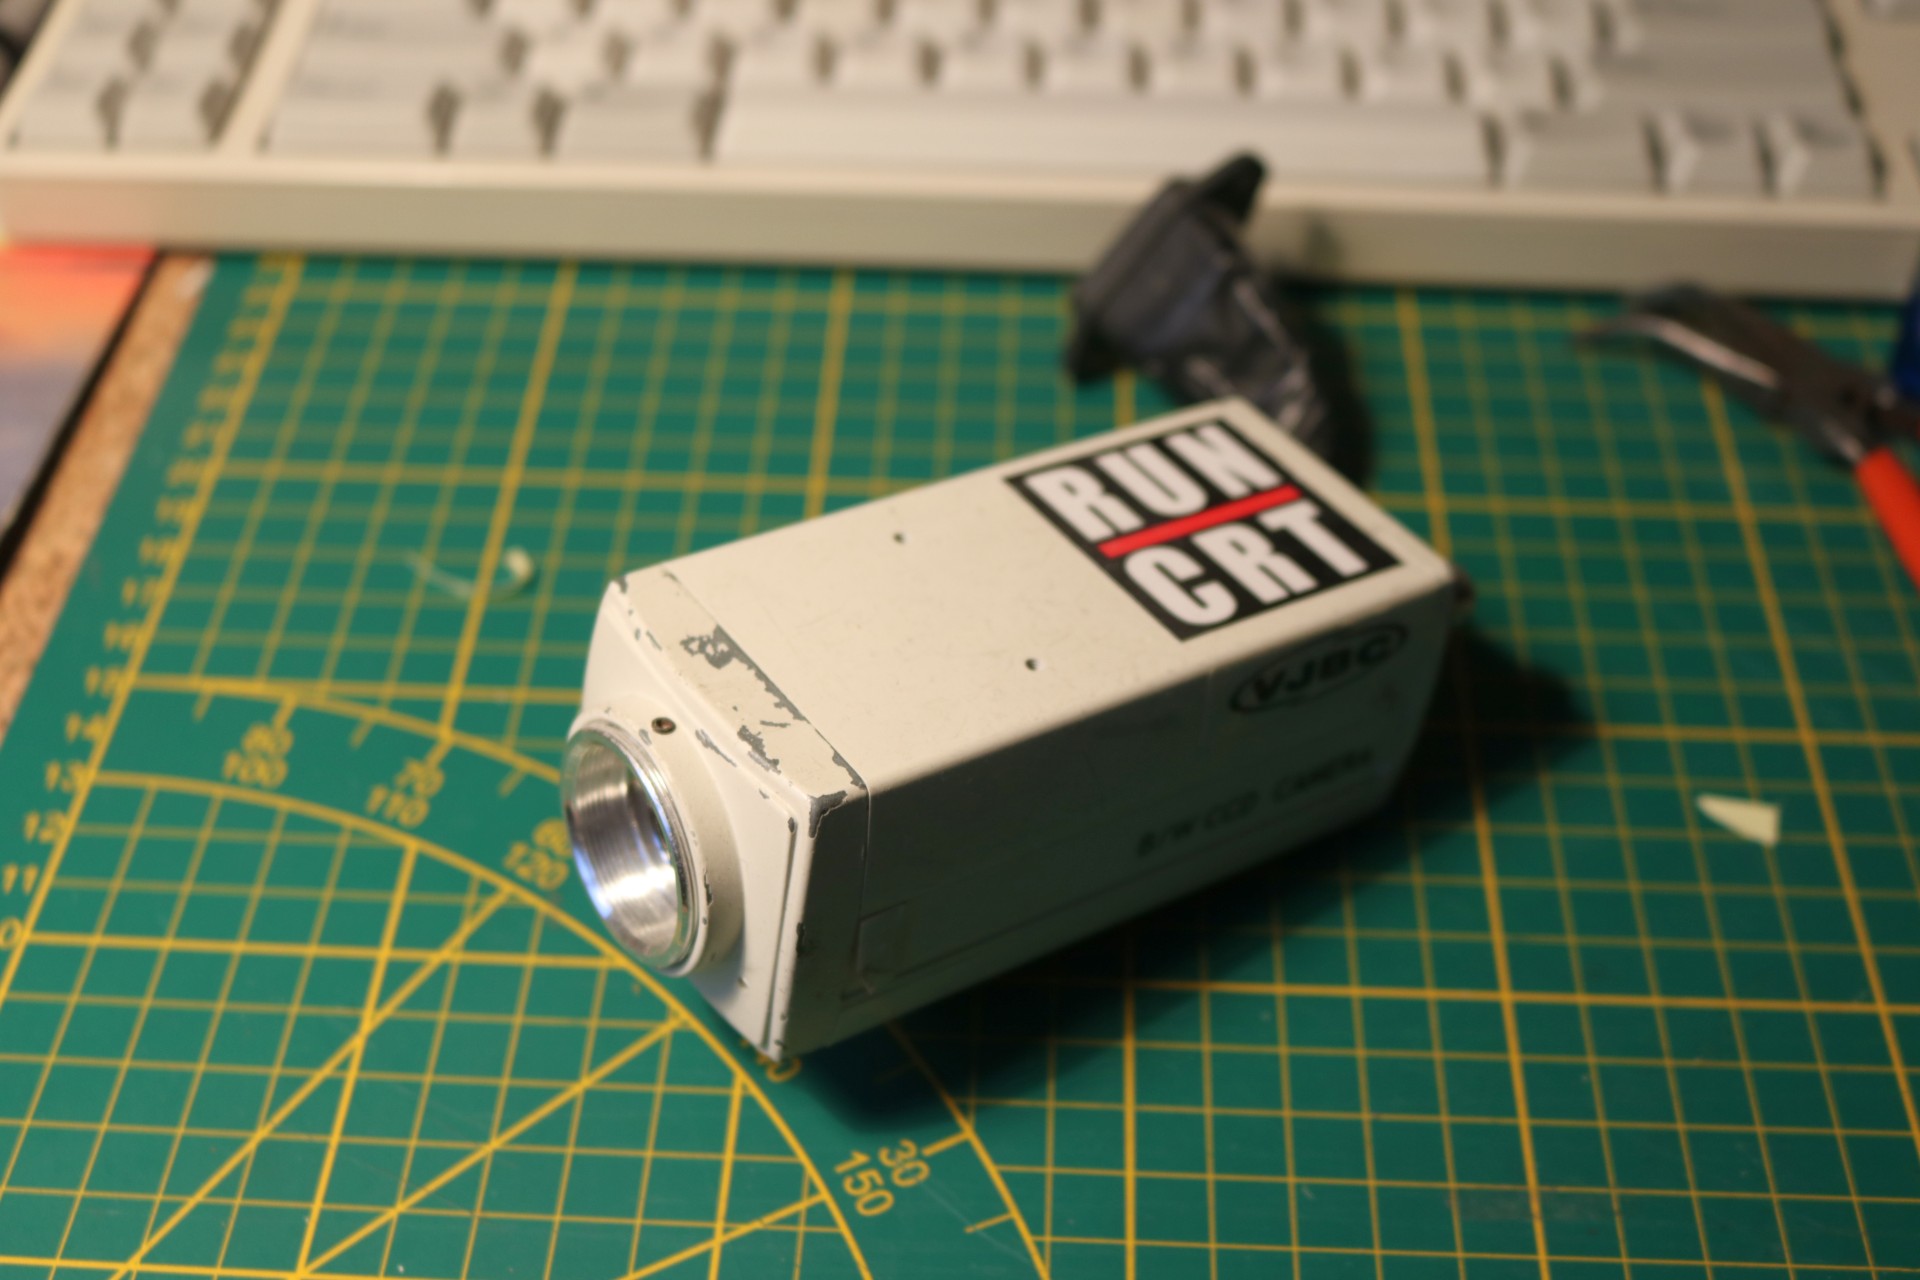
I got several cameras recently. Most of them are analogue CCTV kind. They have proven useful for a variety of tasks, mainly playing with analogue video, optics and machine vision. The resolution is far from stunning but the image quality is OK and I can easily grab the video from them using a regular TV tuner or video capture card, both of which are extremely cheap and readily available. As most places switch to IP camera based surveilance solutions, the analogue cameras are being sold for scrap prices - some of the ones I have were sold as-is from chests with tens of each kind for an eqiuivalent of $5 a piece (lens included!).
However, being CCTV, they all are CS-mount. No problem - I have a lot of CS-mount lenses for them. However, I also have two C-mount lenses - that I would like to use - but no C-mount camera. Fortunately, it's easy to adapt the camera and this is what the post is about.
C and CS mounts are very similar - a C-mount lens will fit a CS-mount camera and vice-versa. The only mechanical difference between them is the flange focal distance, which is the distance between the focal plane and the lens flange.
The image below outlines the optical part of a typical low-cost camera.
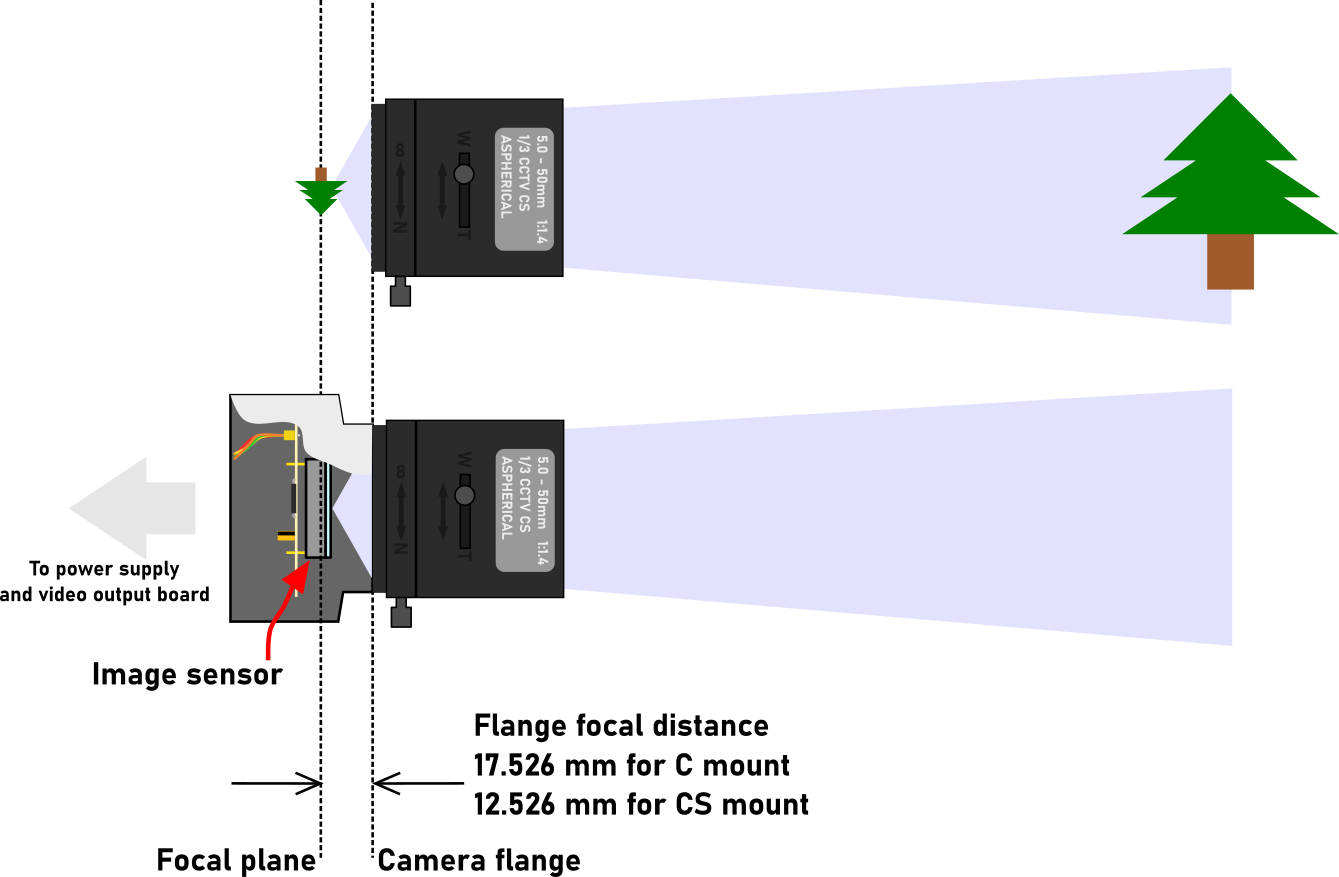
A simplified way of image projection by a lens and the front of a typical low-cost video camera.
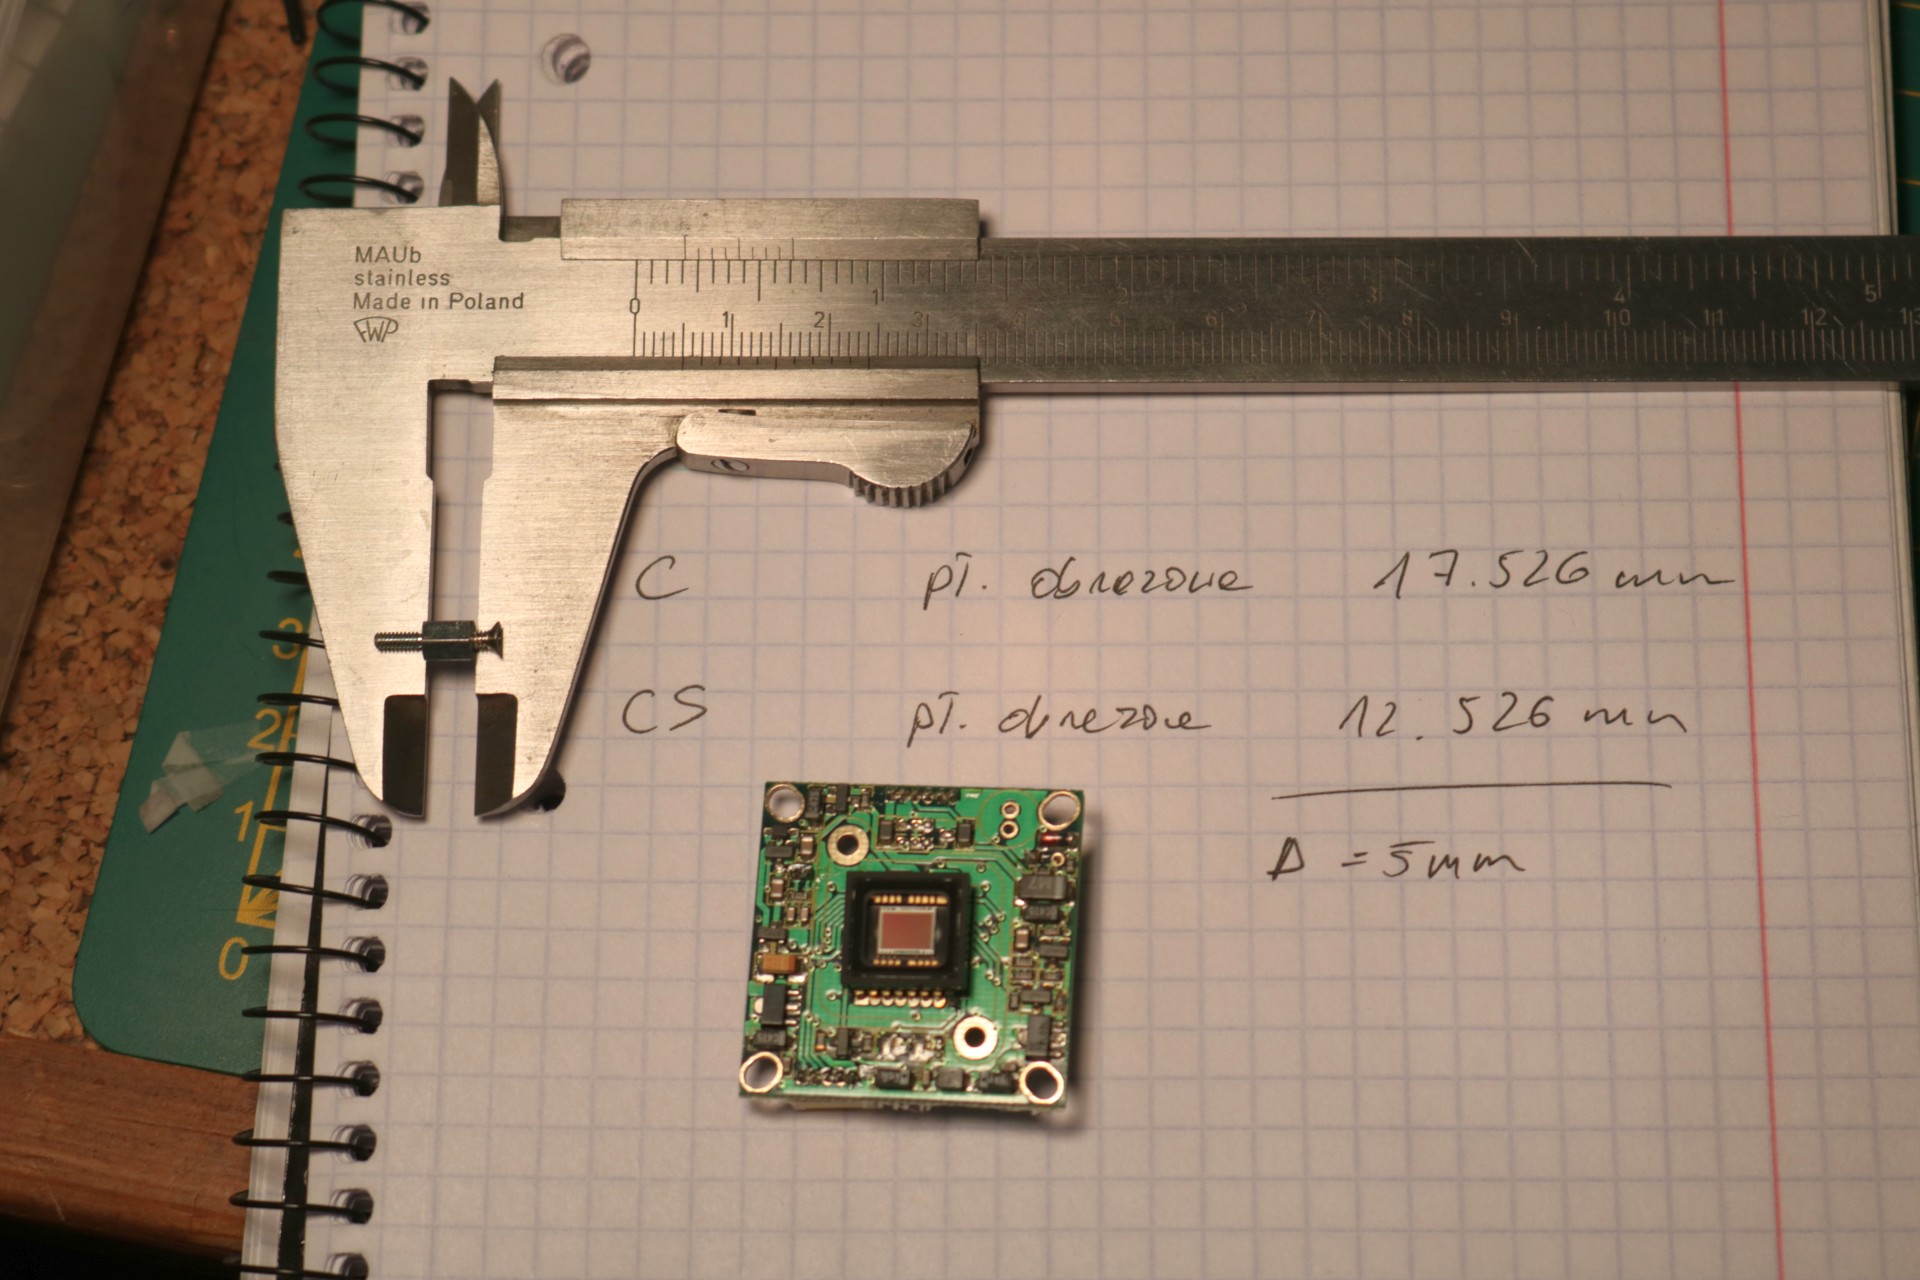
As you can see, the only difference is the distance at which a lens will create a sharp image. In case of C and CS, that distance difference is exactly 5mm. All other mechanical parameters are the same, as seen below
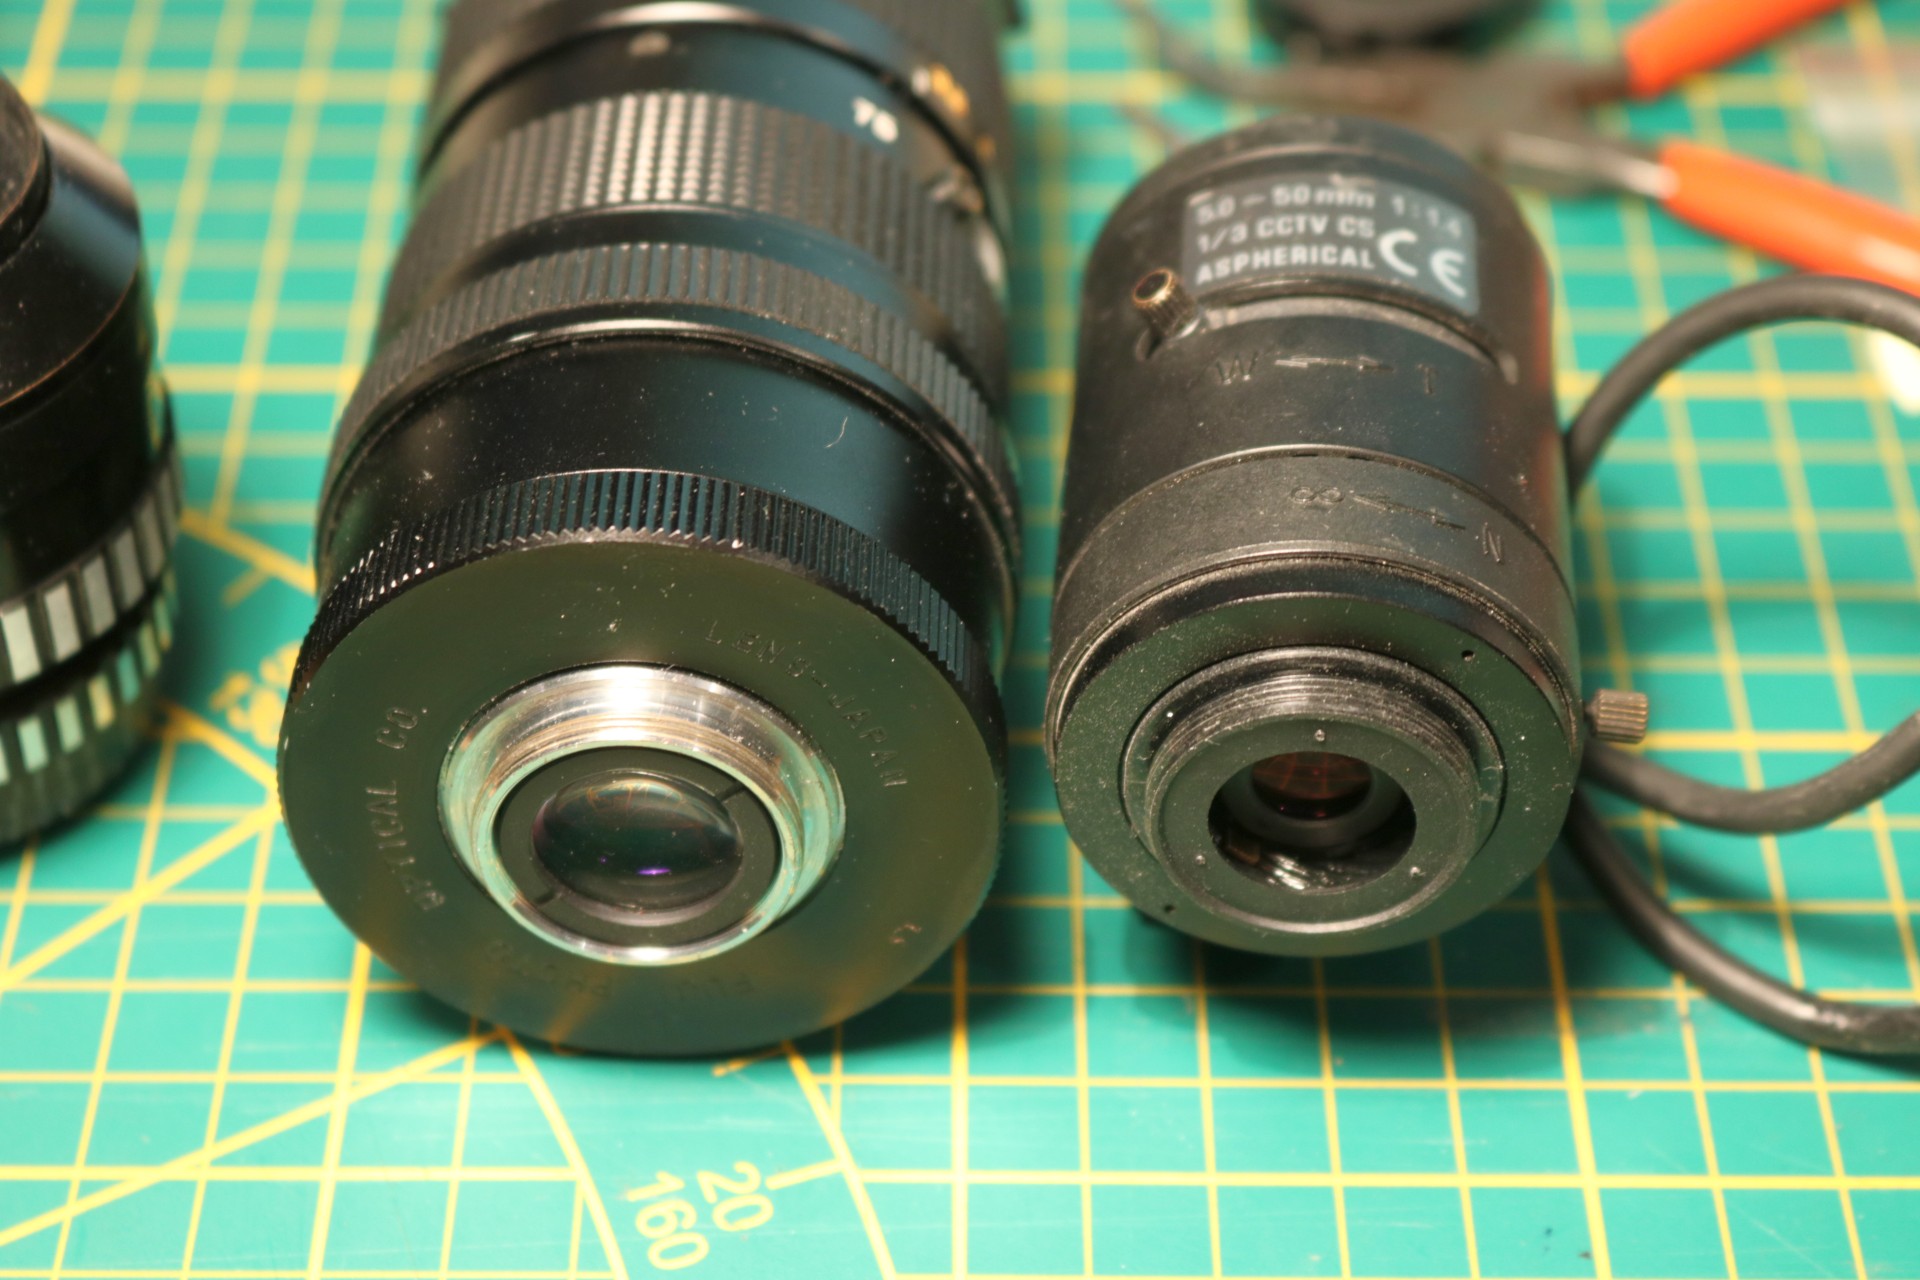
Lens mount comparison: Left - C-mount lens, Fujinon-TV zoom lens 1:1.2/12.5-75; right - 5.0 - 50mm 1:1.4 1/3 CCTV CS lens, unknown manufacturer.
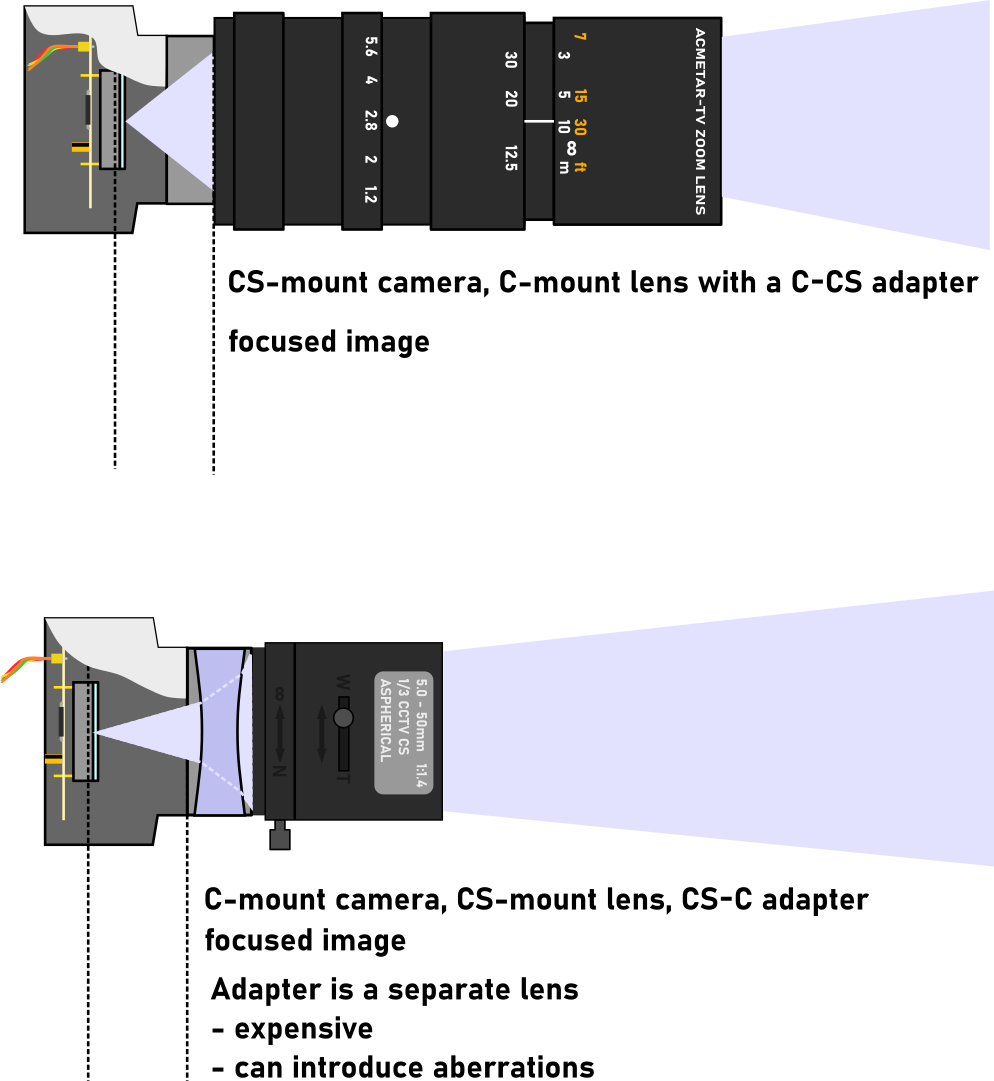
Of course, for different distances of the object, the lens will create a sharp image at different distances on the other side. On the focal plane, only the objects within the depth of field will be in focus, and the focus ring on the lens is there to adjust that. In general, the image will be focused close within the flange focal distance. The combinations of lens and camera types are illustrated below.
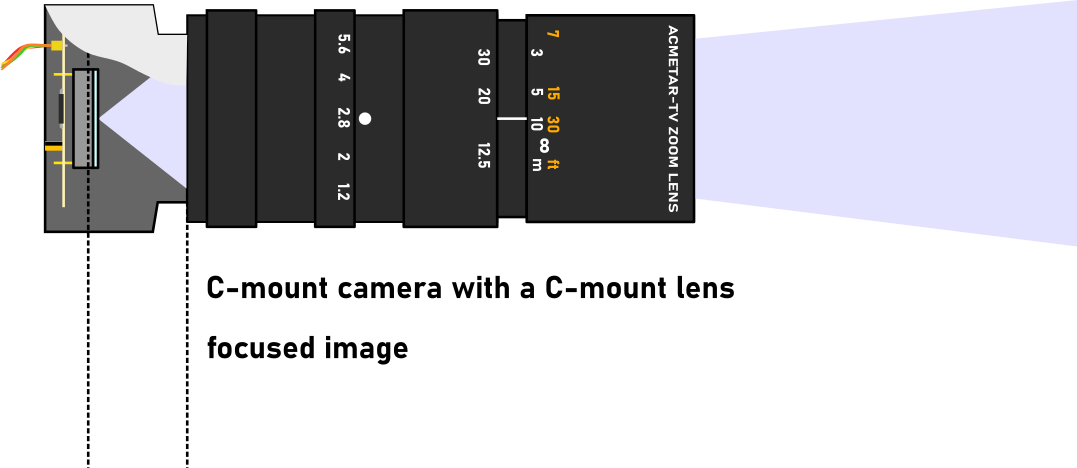

You need to match lens and camera mounts to have focus and focal plane at the sensor surface

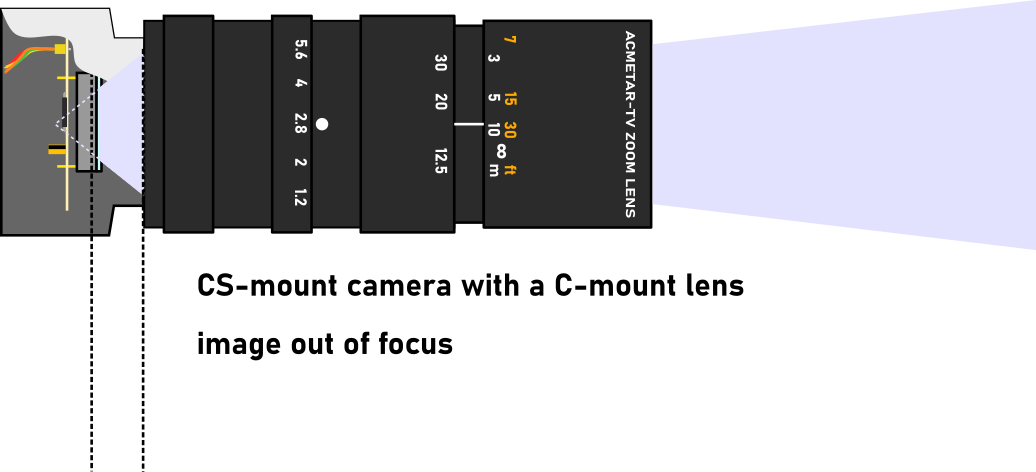
Without matching mounts and lenses, the image will be out of focus, or not recognizable at all - it's either focused in between the sensor and the lens, or behind the sensor entirely.
One way of solving that is lens adapters. The C-to-CS is simple - it's just a piece of a tube threaded with the right thread (1-32 UN 2A UTS = 32 threads per inch, 1 inch diameter) on both ends that will move the lens away 5mm from the sensor.
The CS-to-C is more tricky, as it needs to make the lens appear closer by 5 mm. I was not able to find any of these, but it's entirely possible to build one with a concave lens (it would however introduce aberrations to the image). Both of these are pictured below.
There is one more difference - The aperture control. CS-mount is a succesor to the C-mount and it features a mechanism to automatically control the aperture size. In a similar way to how the M42 screw mount evolved to have an extra aperture close pin, which allowed to you see a bright image while looking through a viewfinder, and close the aperture down to the set value just when taking a photo, CS-mount lenses have electric aperture control. It's an extra cable that goes to the camera body and is terminated with a characteristic 4 pin connector.
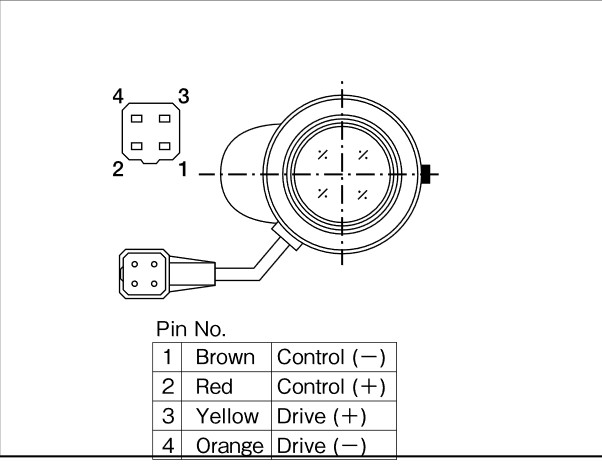
Aperture ("Iris") cable pinout, from Computar Technical guide to Lenses
In a CS camera, the autoexposure circuit controls a driver, which in turn drives the aperture galvo. Unfortunately, the aperture is normally closed, so there is absolutely no light passing through the lens unless the aperture is actively driven.
With that in mind I came up with a different idea - if I could increase the distance between the lens flange and the sensor by that 5mm, I would essentially convert my CS-mount camera into a C-mount camera without the need for an external adapter ring. There was one detail left to solve though.
I was not sure how the camera would expose the images without the means to control the aperture on the C-mount lens. I didn't really have any idea how to tackle that, as the Fujinon has a manual aperture ring, and the other Zeiss C-mount lens does not have an adjustable aperture at all. I decided to just give it a try and see what happens. I installed the lens on the camera and I was surprised to see it was exposing perfectly fine, by adjusting the exposure time and/or the sensor gain internally.
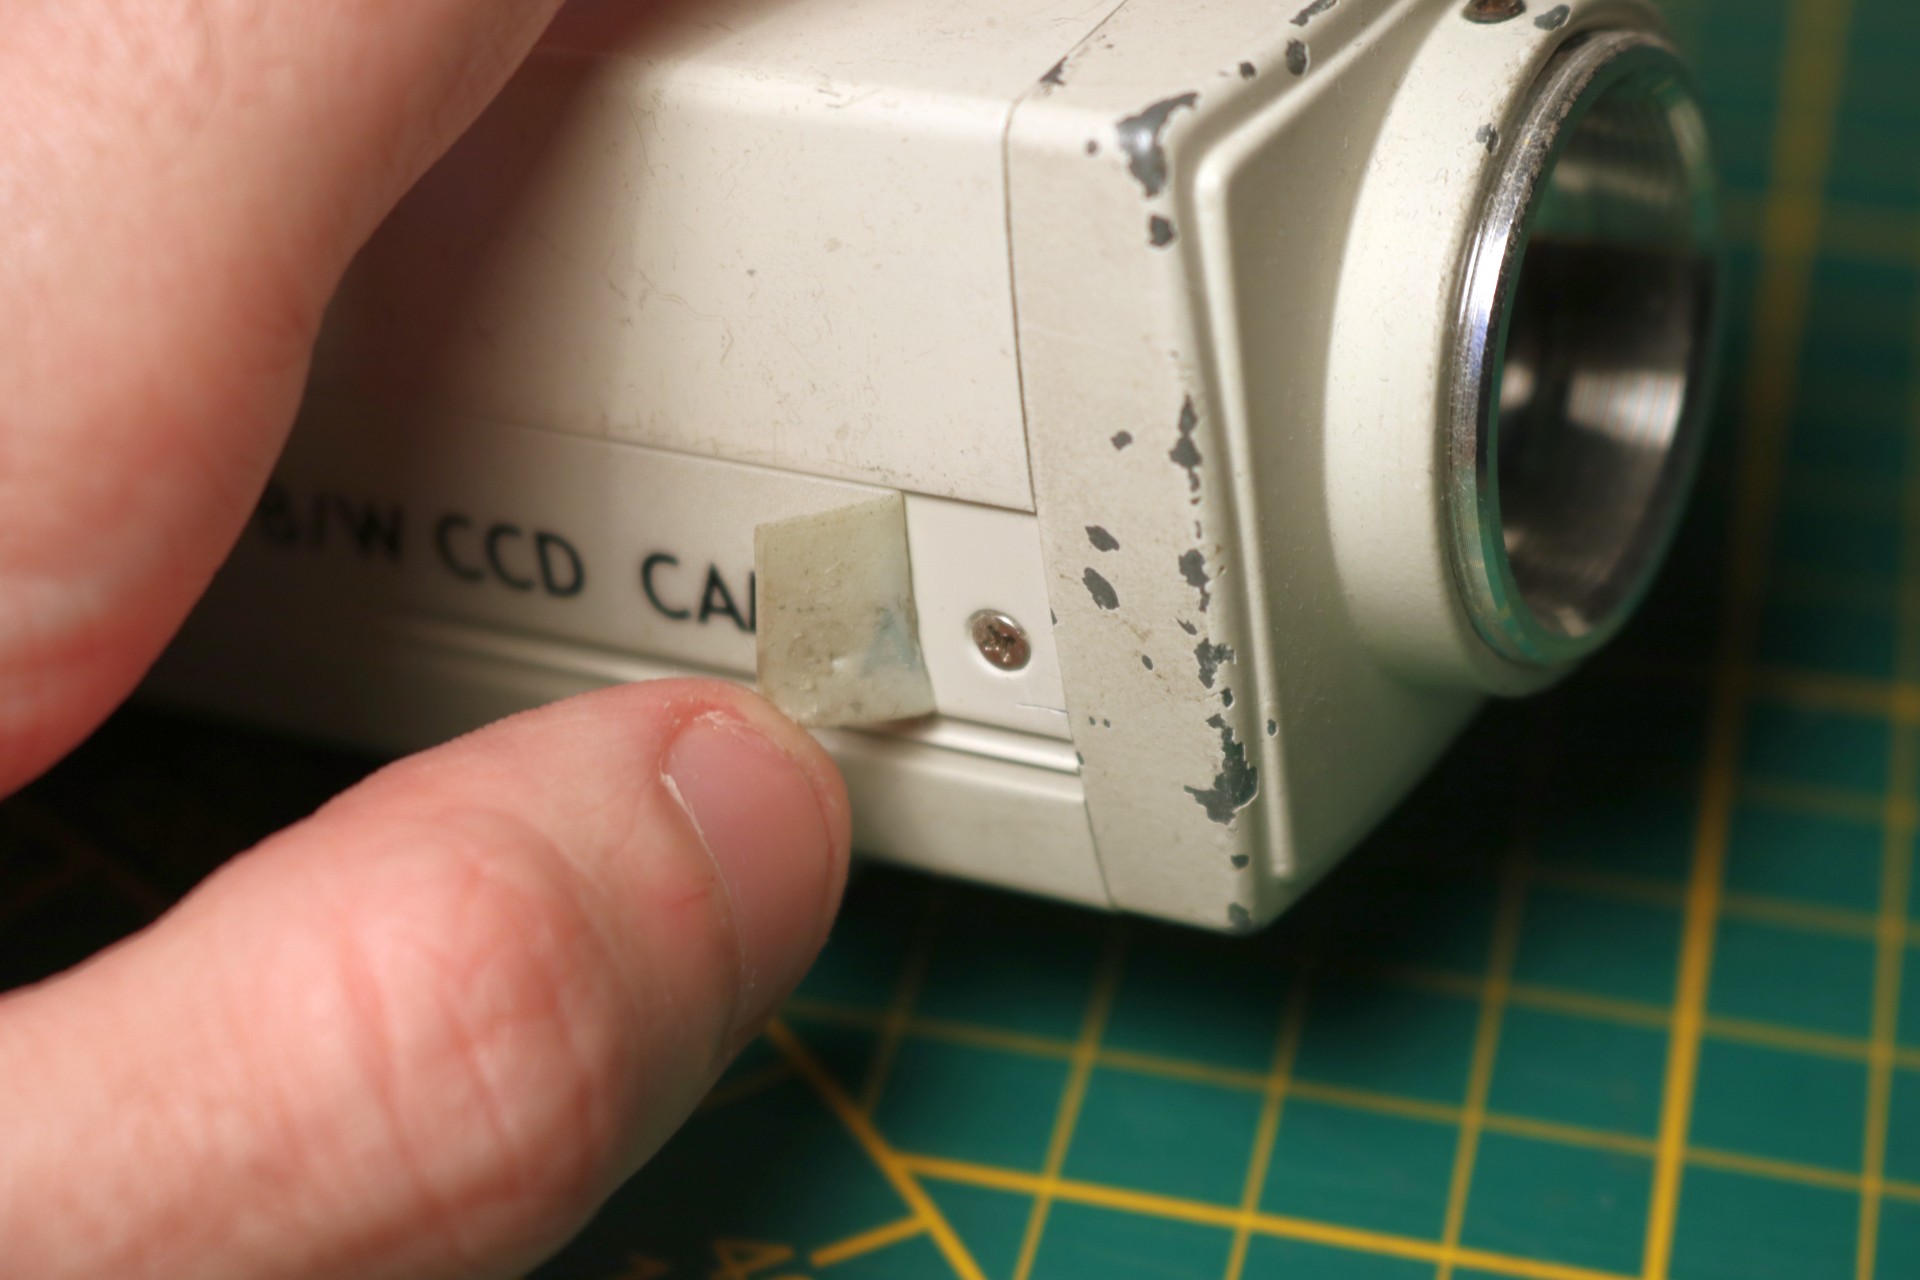
With that sorted, I decided to open the camera (I've done that many times now, for example to replace the power supply capacitors) by removing the two screws in front. This released the front part that has the lens mount thread and the sensor PCB.
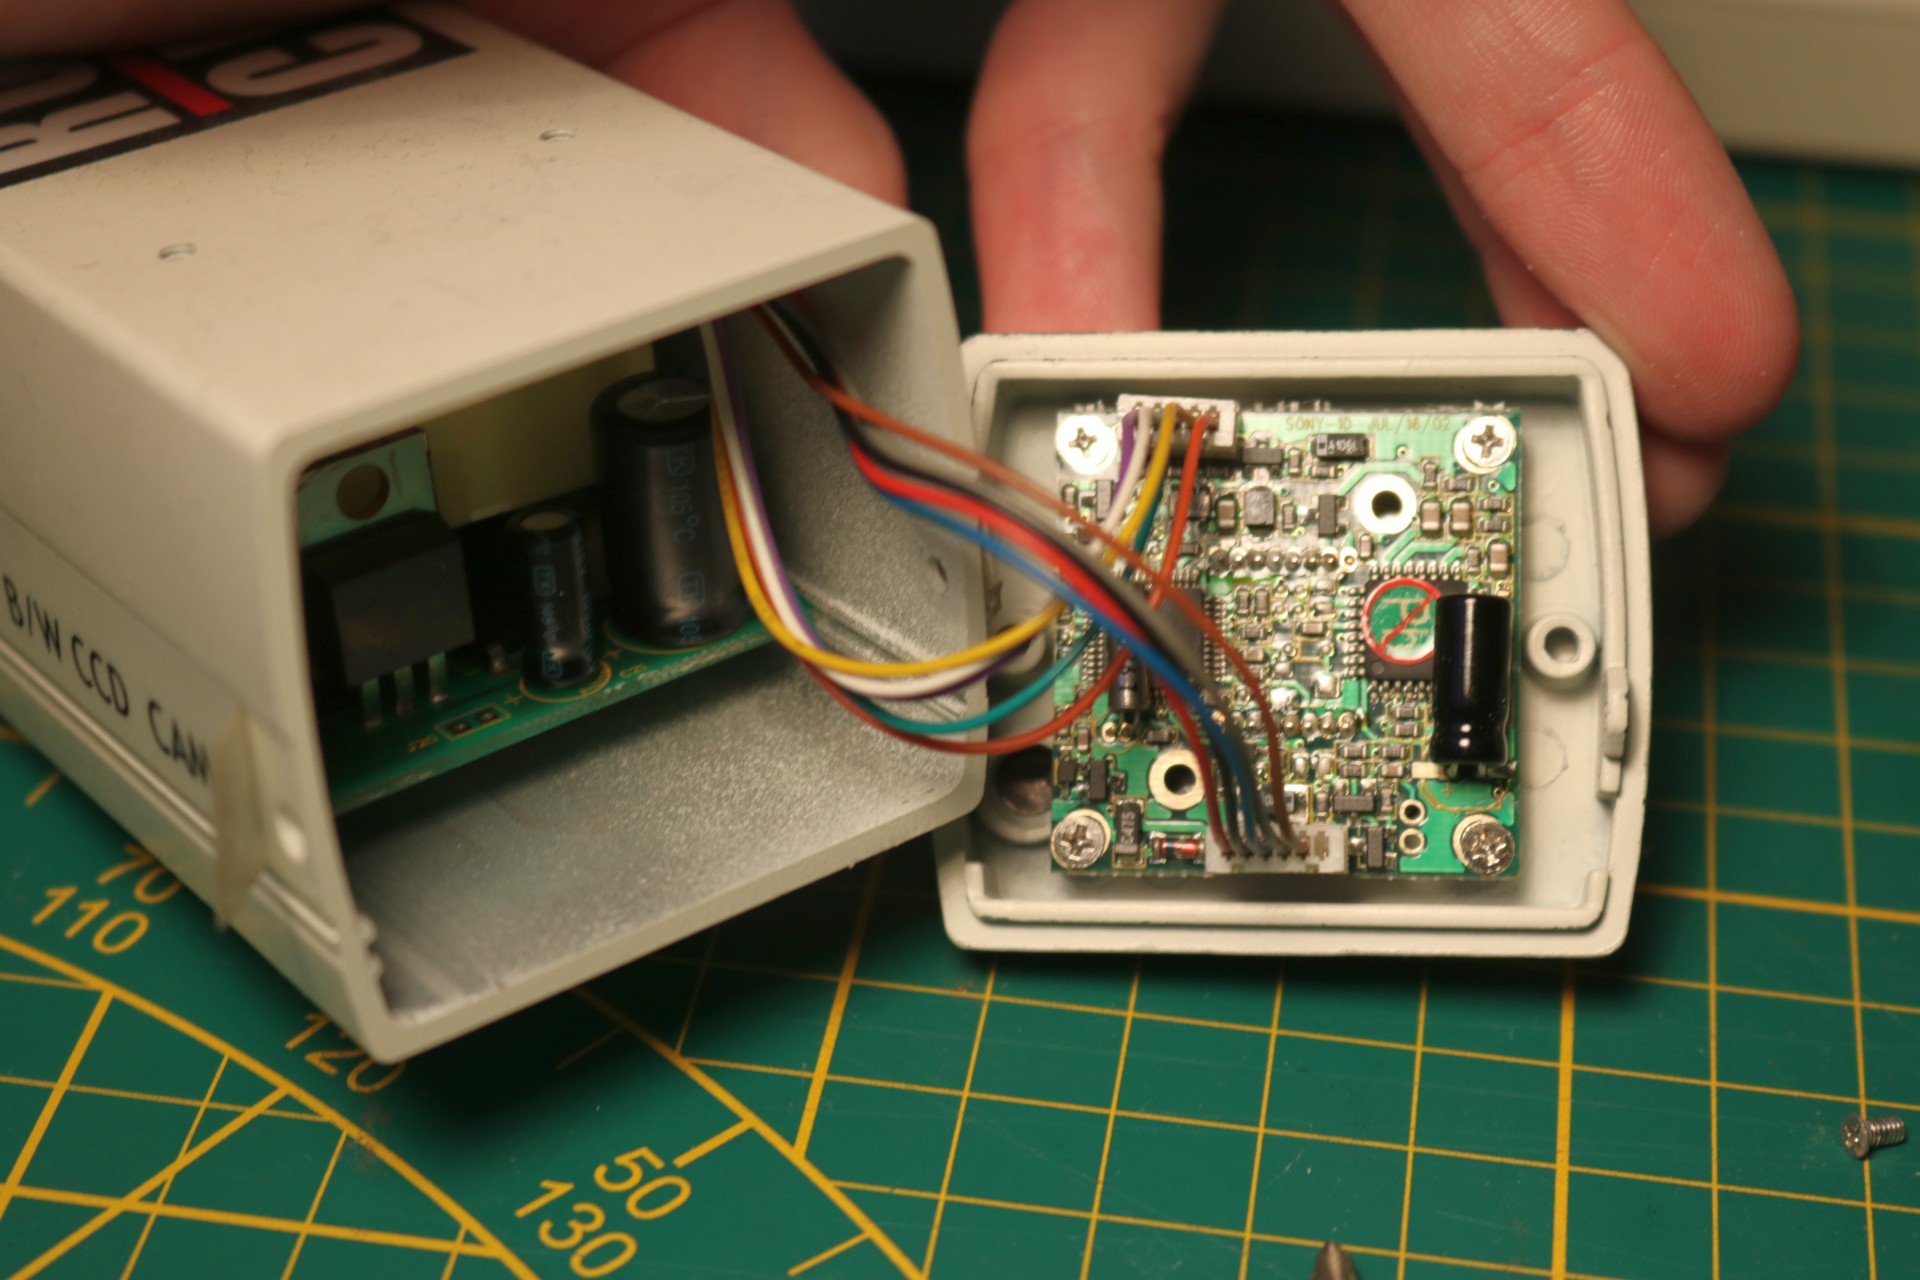
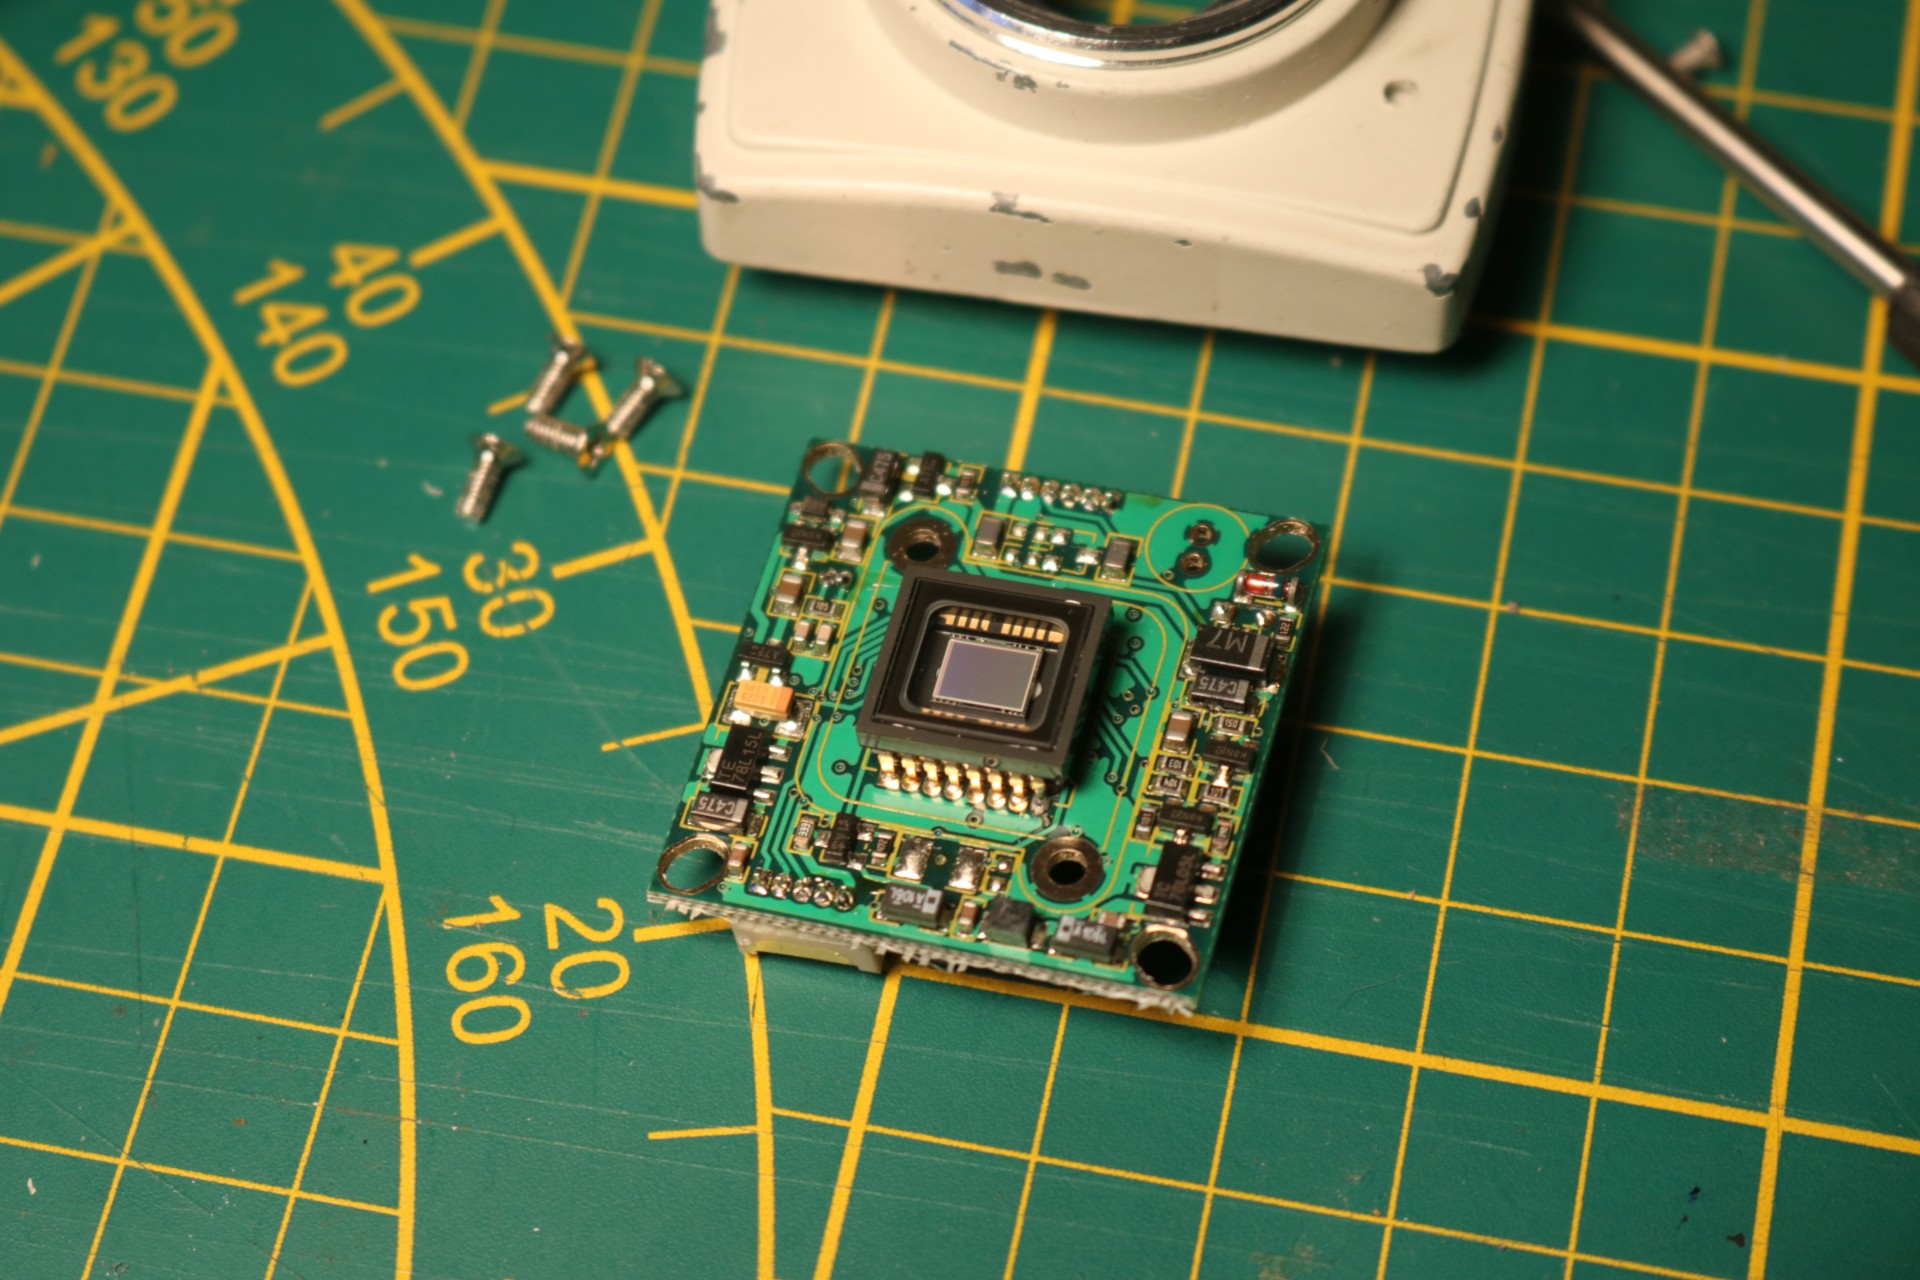

The sensor board is held in place by four M2.5 screws and there are two connectors that carry power, video and control signals to the back IO board. You can also see the power supply inside the camera.
With that out of place I went through my screw drawer and by a strike of luck found two 5mm M2.5 spacers. Their threads were initially too long to fit the existing screw holes but I was able to file them off to a desired length
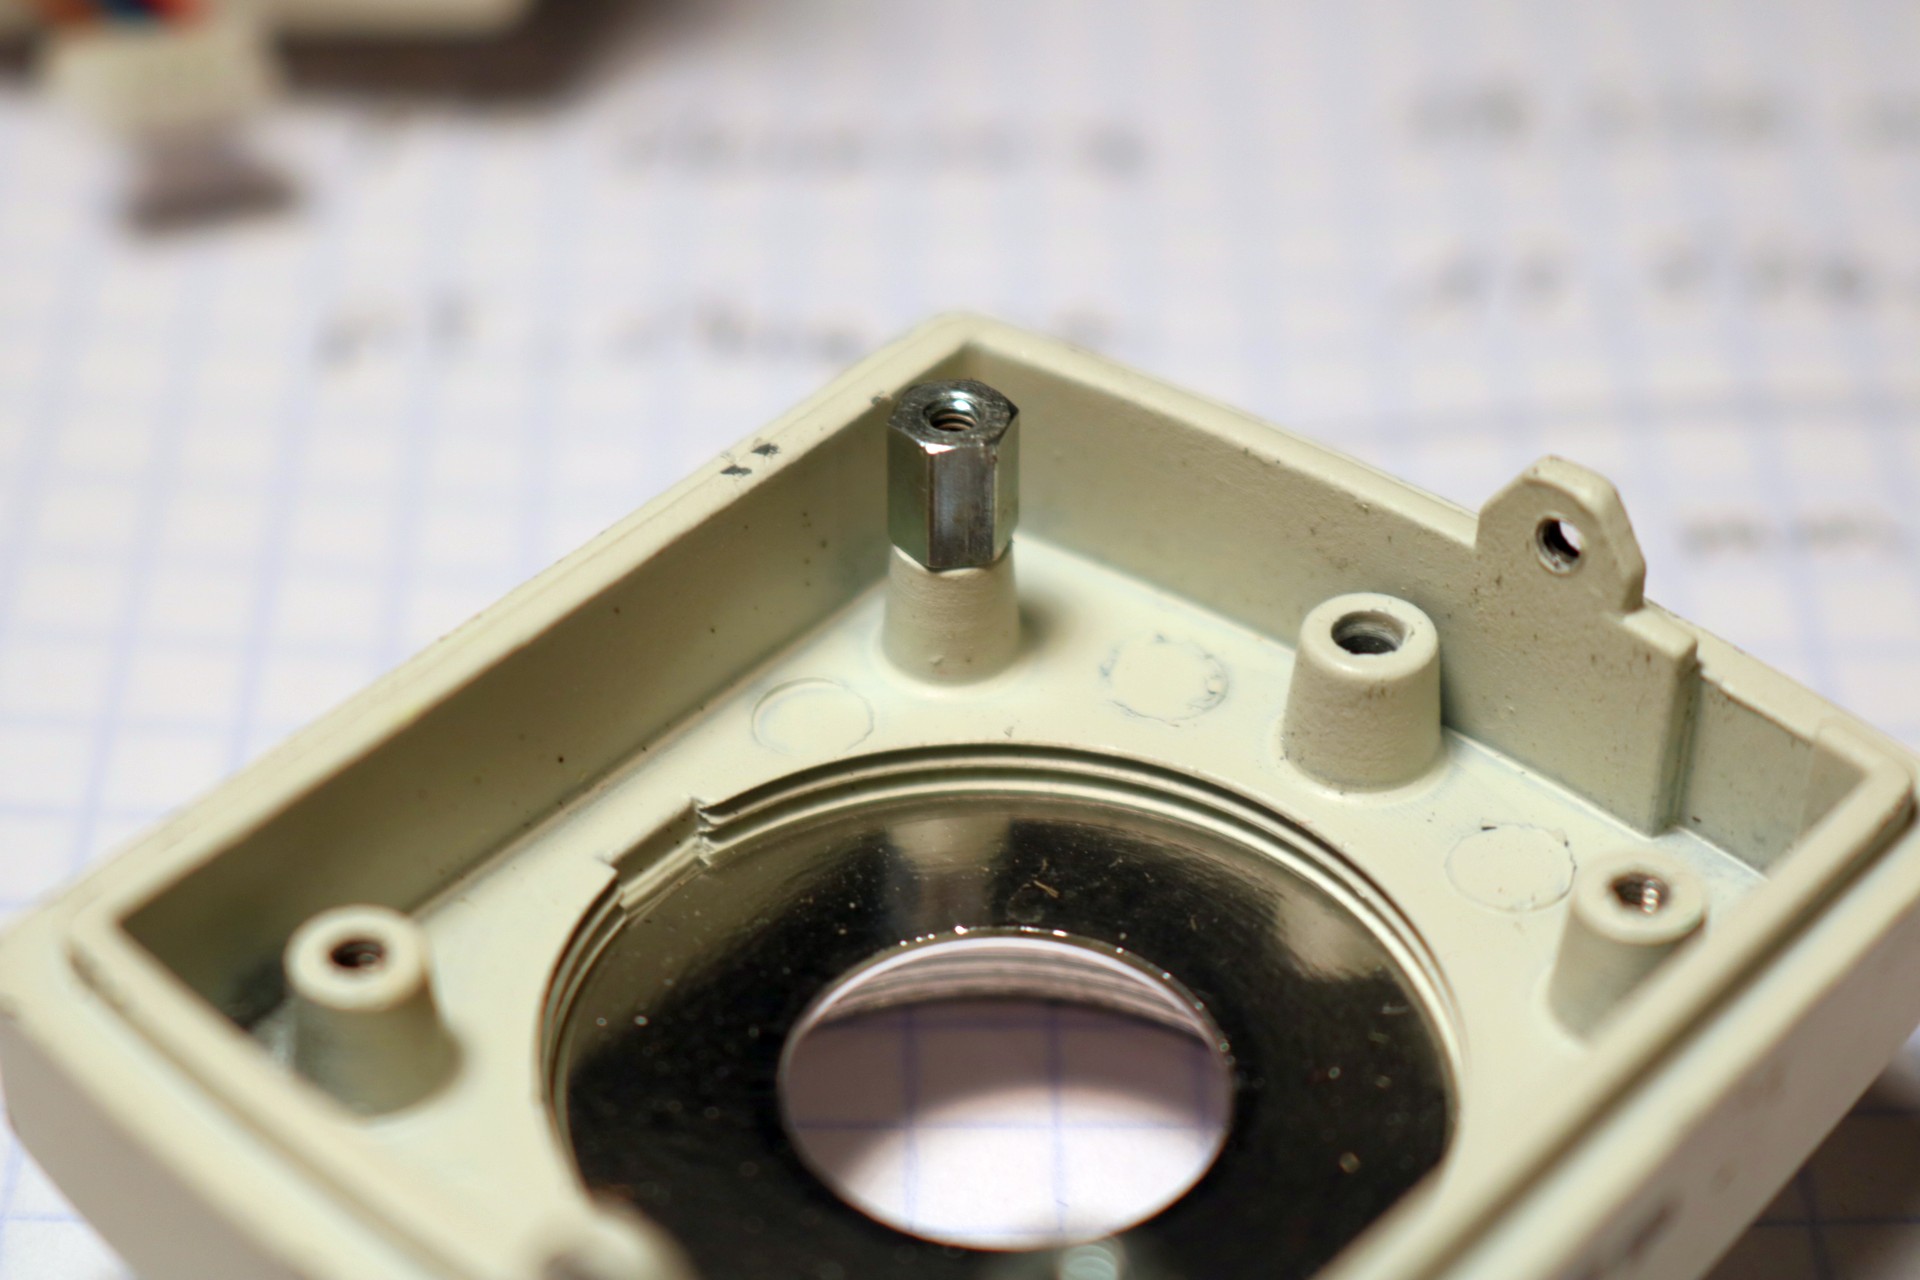
Below you can see the sensor board reinstalled with a different flange focal distance


The camera is now ready to have a C-mount lens installed and should produce focused images.This concludes the mechanical part of the modification. If you are curious about the camera performance after the mod, check out the second part of this post, where I test various lenses on the camera.
If you found this post interesting, you may also like the other ones too. Click on the link below to go to the main page which lists all of them.